Woodfired Oven Wood
Woodfired oven wood – which one do I use, where do I get it, how do I store it. These crucial questions and more are all on the minds of our woodfired cooking students. You wouldn’t think there was so much to know about your woodfired oven wood. Don’t worry though – we’ve got the answers here and in this week’s #woodfiredweekly.
Woodfired Oven Wood – what kind do I want?
The best you can use is kiln dried, quick growing hard wood. Kiln-dried birch grows quick and straight and is consequently easy to split with your axe into kindling. You can buy lots of different kinds online now but we’ve found this is the best. Slower growing hard woods take longer to replace and tend to be full of knots so more difficult to split. Don’t use softer woods as they will split and be resinous – pine, pallets etc.
We can now supply it on the UK mainland so if you’d like some, do order it online.
Woodfired Oven Wood – what about moisture content
Get yourself a moisture meter to check the moisture content of your wood. It’s very easy to use – shove the prongs into the wood and the moisture content reading will show up. The moisture content wants to be mid-teens or less. Kiln dried wood is around 0-5% which couldn’t be more perfect. A low moisture content means your wood will catch fire quickly, not create excessive smoke and not annoy the neighbours.
Dry wood produces less smoke and more heat – simple!
Woodfired Oven Wood – storage
Once your wood arrives, make sure you stack it so that air can circulate – neatly stacked up end to end. Also make sure it’s under cover. In the UK, it’s always likely to be generally moist or damp so don’t buy your wood in so much volume that it will absorb moisture before you use it. Little and often – acubic metre at a time works for us. We get through that amount every 6 weeks and store it wherever we have space until we need it – under the ovens, under the workbenches, under our seats; anywhere it won’d get directly rained on.
Remember wood is hydroscopic – meaning it will absorb moisture over time, even the kiln-dried stuff
Woodfired Oven Wood – equipment
As well as your moisture meter, you’ll need a good axe for splitting your wood into kindling. We use small sticks and kindling all the time for starting the fire and then also managing the fire and temperature quickly; big bits of wood just take longer to work. Different sizes give maximum heat control and the best way to get different sizes is with a good axe splitting straight-grained dry wood.
You will also need a block to chop your wood on which will save your floor. We use a large bit of tree trunk that has been cut down. Eventually – and this will take a few years – it breaks up with all the pounding but then we just use that wood on the fire and start with a new block.
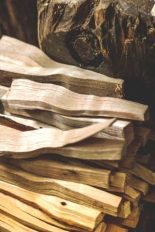
Satisfyingly split kindling
We have a couple of large plastic boxes to keep the kindling stored and ready to use. It’s then less tempting for Scout the dog to think it’s a game and take it all over the garden.

What d’you mean, it’s not a game??
Concentration – make sure you’re not distracted when you’re splitting the wood. You can wait a long time in the hospital to get stitched up….#justsaying
Woodfired Oven Wood – flavouring food
The wood we chop up to burn is not the wood we use to flavour dishes we are cooking. We use bags of chips or chunks that are soaked in water first to then be put on the embers to create smoke which will consequently flavour your food. You can really play around with lots of different flavours – we love cherry with mussels, apple with chicken, oak with beef; so many possibilities. If it’s short sharp cooking, we use chips; and if it’s a bigger piece of meat that takes longer to cook, then we’ll use chunks.

Mussels smoked with Cherry Wood Chips
Woodfired Oven Wood – Building and Using your Fire Effectively
Do check out our previous #woodfiredweekly on building your fire and its accompanying blog.
Well we hope that’s all been of use – any questions, as ever, just let us know.
Happy Cooking
David and Holly
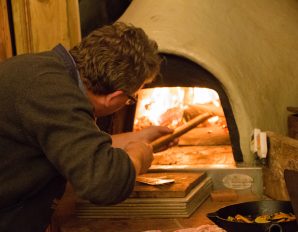
Just managing my fire…!


