Making a Sourdough Starter
With time on our hands, a renewed interest in baking and yeast being difficult to source, the nation’s interest in sourdough bread is soaring.
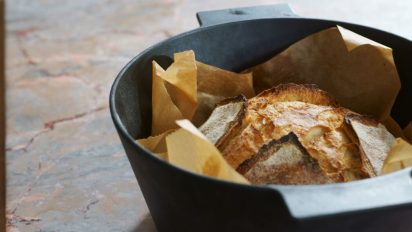
We love sourdough in all its forms and have been enjoying it for years for the following reasons and more –
- Sourdough breads taste awesome and make amazing toast.
- Because we love to chew on a good crust.
- No additives, no enhancers, just flour, water, salt and ‘starter’.
- Easy on the digestion, even for the wheat intolerant.
- Easier for us to extract its nutrients making it so much more nutritious.
- Challenging to make well every time – and that’s a good thing from where we’re standing as it engages your brain
- Blissfully rewarding when your perfect loaf comes out of the oven and even more so when you do it consistently
- Did we mention how good this stuff tastes?

Here’s a few notes on what a starter actually is, how to make it and once you’ve got one, how to look after it. Remember you can download our Sourdough App and have a virtual David with you in your own kitchen as you bake your own sourdough bread.
Creating and Maintaining Your Sourdough Starter
You’ve got to nurture some yeast – There are literally millions of yeast spores adhering to the crushed wheat grains in flour. Harnessing some to start a colony that will ferment your sourdough bread is not a difficult task. If it is nurtured properly you can build up this culture until it has the vigour to ferment your household sourdough bread on a regular basis.
Begin by making a paste of flour and water in a small mixing bowl. Start with rye flour if you can get hold of it – the starter will be a more lively if you use rye flour to make it even if it converts to wheat later. Wholemeal flour, especially stoneground wholemeal, is also very good.
If you live in an area where the tap water is heavily chlorinated use filtered or spring water; or use the tap water after it has sat in a jug for an hour or so.
Lovely as it is to keep it in a Kilner jar and imagine you’re living in a Nigel Slater cookery series, to be honest our starter’s home is rather more modest and lives in an old yoghurt pot with a snappy-on lid. This means that when it gets really vigorous at room temperature (and it does!), the starter will burp itself and if it’s even more lively, nothing more dramatic will happen than the lid gets blown off (I’m thinking Michael Caine in the Italian Job here) rather than the jar exploding and your starter going everywhere. 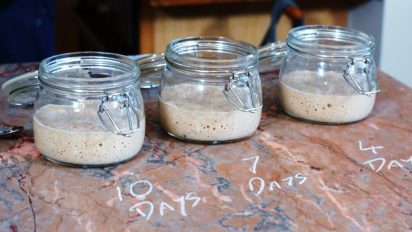
Starter – 125g of water mixed with 100g of rye flour. Allow this wet paste to sit at room temperature. Do not put it in a cool place like a larder or a fridge. Loosely cover the bowl or put it inside a large plastic bag so that nothing drops into it. Stir daily. After only two or three days your wild yeast should be showing itself with clusters of fine bubbles of gas visible in the paste.
Refreshment – To build up your starter when it is a newbie and then keep it lively as a mature worker, you must feed it regularly, every second or third day. This feeding is called refreshment and the fresh flour is its food.
To begin with, the quantities at the time of refreshment can be viewed as thirds – one-third starter, one-third fresh flour, one-third water. Having the water content as high as a third will mean that it stays as a wet paste. Take 100g starter and refresh it to make 300g – that means stir in 100g fresh flour and 100g water.
After several of these wet refreshments you should notice the mixture rising steadily after each refreshment. Its smell will be either winey, vinegary, beery or perhaps cheesy; all good smells of fermenting flour. You’re now ready to make some bread. If some liquid separates and sits on the top (the hooch) as it’s standing, just stir it back in when you’re refreshing the starter.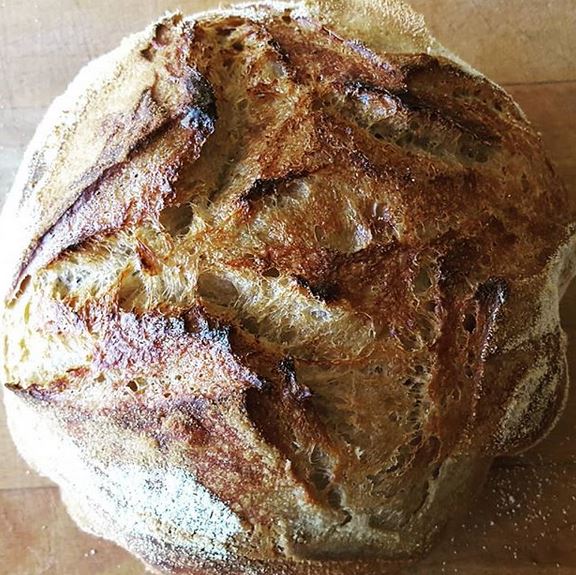
Leaven for Bread –
Some hours before you make bread you will need to refresh your starter to make a leaven for your bread. The leaven will rise to its peak in about 8 hours so make it the night before or in the morning if making bread in the evening.
If you want to make a bread with a more pronounced sour flavour use a dry starter i.e add flour and less water to your starter; something like –
- 300g starter
- 300g flour ( say 150g strong white, 150g wholemeal)
- 150-200g water
If you prefer a bread of a less sour flavour, the ratio could be:
- 300g starter
- 400g water
- 400g flour (200g strong white, 200g wholemeal)
Remember that these figures can only be approximate guidelines. You will have to make your own adjustments because different flours have different rates of water absorption and wholemeal needs more water than white, or the amount of water you need will be less if your leaven is damp etc.
What to do with your starter when you’re not making bread –
Now you have the guidelines for the management of your leaven. This is how you refresh it for the rest of its life. Even if you’re not making bread, you need to feed your starter regularly, at least once a week; so every week, take it out, leave it for a day to achieve room temperature, refresh it, then it can go back to the fridge.
You’ll need to discard some of it so that your fridge doesn’t turn into something from the Sorcerer’s Apprentice. We just rinse it down the sink with cold water (very good for our septic tank; apologies if tmi?!) or use it to make waffles or pancakes or drop scones. 
We hope that answers some sourdough starter questions; if you have any more, drop us an email or join us on one of our Sourdough Saturdays.
Happy cooking
David and Holly
